Every Plan is a Good Plan – Until the First Shot is Fired
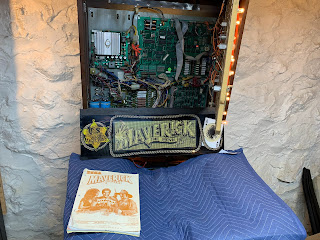
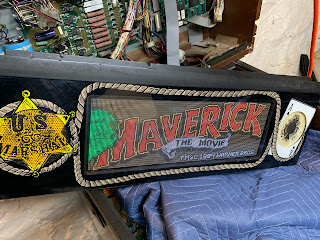
I'm almost to the point where I can remove the pin from my car. I have had to rearrange a lot of my basement in anticipation of this project, and they guy selling it wanted the machine gone. I can't wait to get started. I had promised to discuss the project plan, and, without pictures, it will mean less to people, I'll do my best. Perhaps I'll do a followup post to discuss issues. Below is my project plan, copied verbatim from by Google doc:
Guts of Machine:Investigate fusesCan I buy that fucked up cable or do I need to remake it?No need to do this now, but start the process while you clean the playfield. This step likely requires parts. Take pictures!
- Pg 4 of doc
- Figure out what that extra fuse is on the PSBoard.
Remove battery from PCBoard
- Stretch cable
- New (to me) cable
- Wire butt connectors
Check that ground strap, add to order below
- NVRAM?
Playfield: (should be done early, stuff will be ordered from this)Remove everything. Take pictures! If you fuck up, the manual will fix it for you.Ultrasonically clean stuff from top of playfield (screws, posts)
- Save anything that’s busted in a used parts box – it goes with the machine
Remove drop targets and ultrasonic. Take pictures!
- Catalog everything that needs to be ordered
Scrub ramps & cagesCarefully look at all clear inserts, make sure they are flush, and clean.
- Possibly polish cages too
Carefully look at play surface. Should anything be touched up?
Glue down that poker chip cover in the alley
Clean & Wax playsurface
Cabinet: (Can be done while waiting on parts)Vacuum & wipe out cabinet
Wood filler into the sides and anywhere obvious that needs it?
Paint brown, and investigate touching up restRework apron
- There’s a decal set, but it’s expensive.
Coin doorClean and polish the coin door?
- Check mechanism
- Check lighting on coin reject button
- Coin door transparencies? Keep as is?
Do I want to polish bar under the beer seal
Clean backglass
Fix anything with the legs you don’t like
Install cupholderClean any chutes, knowing that the balls are going through there.
- 3d print? (maybe adds a day to the build)
Reassemble the playfield
ElectronicsCheck transformer, make sure it’s not waxy or leaky
Check varister & line filter
Make sure all fuses are correct values
Board maintenance:Walk through the machine, chasing power, fixing as you go
- Take pictures
- Label/remove connectors, double checking that you’ve taken pictures
- Double check color coding on connectors with schematics
- Fix any connectors that look bad
- Remove board from unit
- Check solder joints – make sure to check connector solder joints
- Clean and reflow anything that looks suspect, treat connectors as suspect
- Lightly clean board – aerosol (alcohol?)
- Check electrolytic capacitors
- Check any power parts
- Reinstall board
- Double check connectors for anything that should be replaced
- Consult pictures, reinstall connectors.
- Double check connectors
PlayBoot machine into test mode
RiverboatTodo
Questions:On the playfield, what needs to be oiled, and what is imperative to leave alone?Are the plunger and start button correct for the machine?
- Switches, I assume should all be left alone. Drop targets? Rollovers?
- Pop bumpers?
- Flippers?
- Is there proper coil maintenance? Do you just replace the sleeves at this stage?
To order:Pinballs
Playfield glass? Can I get it locally?
Microfiber cloths
Playfield polish
Spotlights for the illumination field
LightbulbsPop bumpers & stickers
- Consider an LED kit, but that’s 300$. Perhaps just new bulbs will make it pop enough.
Replacement posts for anything that doesn’t clean up
Beer seal
Coil sleeves
There's a lot in the above that won't make sense until you see some pictures. Anyone who has pinball experience will be able to tell you a lot of my questions are naive. For example: almost nothing on a pinball machine requires oil, and, in fact it's probably a bad idea to oil almost anything. Oil attracts dirt, and pinball machines run dirty, and are too persnickety to have all that gook gumming things up. Additionally, this was written after just a first look at the machine, and I know know I need more parts, like leg levelers, and that I can get LEDs cheaper than 300$, so I'll probably do that anyway.
I'll do a followup post on this when I get the machine out of the car and can take some pictures to describe what we're dealing with.
Note: I've enabled anonymous commenting. Don't make me turn it back on, spammers.


Comments
Post a Comment